Doris, my self-build Camper

wildebus

Full Member

Messages
6,355
Doris, my self-build Camper

Bit of a summary of my VW Transporter T4 Self-Build

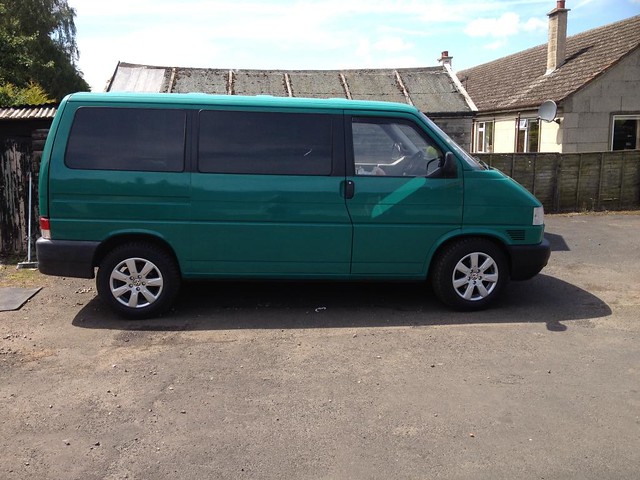
This is the picture of the vehicle in the advert I saw on the VWT4 Forum
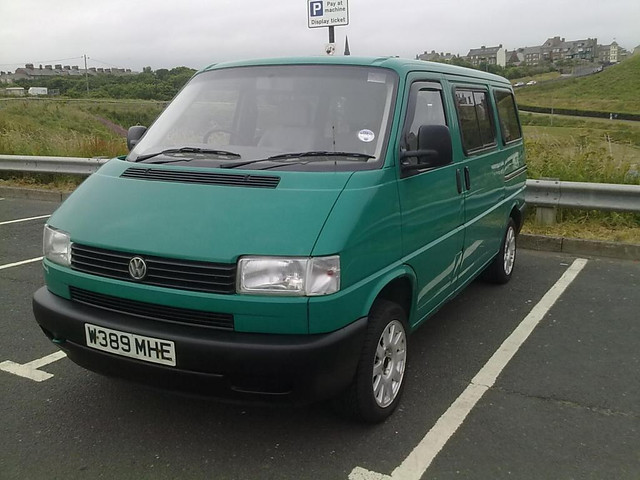
acb77ee87c5f1ac2edf95260a6f11cbe_zpsd50b4774 by David, on Flickr
It is a 2000/W T4 800 Special, converted by Versa to a Mobility Vehicle. Engine is the VW 1.9TD (Turbo non injection) and is a SWB 2.5GVW model.

Back Home and time to start the conversion ...
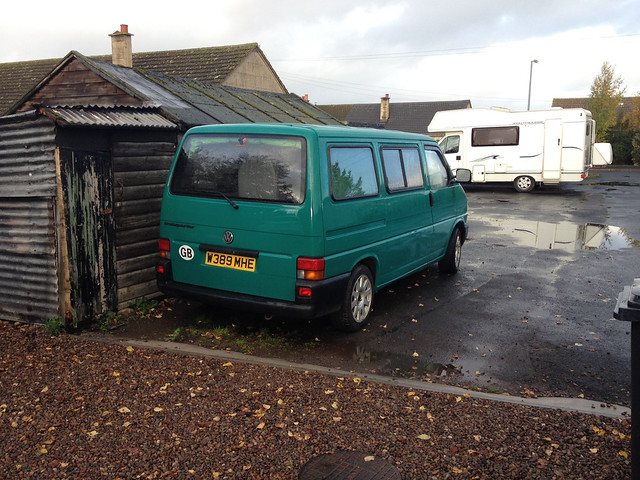
e7ee653b344f2bc48eaacfc7591df2bf_zpsa413bfe3 by David, on Flickr


The vehicle is low mileage for a 2000 T4 at around 90k miles, and the body work is in good condition, especially around the typical T4 bad spots, namely the rear wheel arches. Mechanically, not much history prior to the guy I bought from, but he had the proper servicing done, including cambelt, and it drives well.
 
So what needed doing?
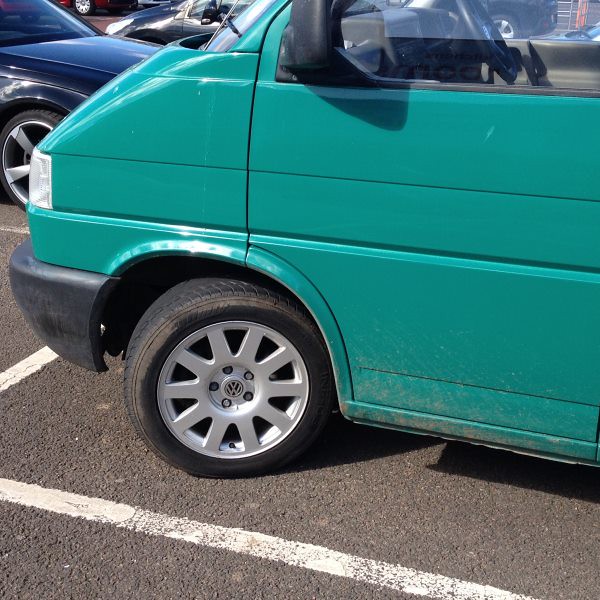
Well, the wheels fitted were from an Audi 80/A4 (can't recall which) and the tyres were a mix of 91 & 94 load rating
Wheels_Centre_On by David, on Flickr
I didn't really like the wheels that much and the tyres were not rated sufficiently, so on the list were new wheels and tyres.


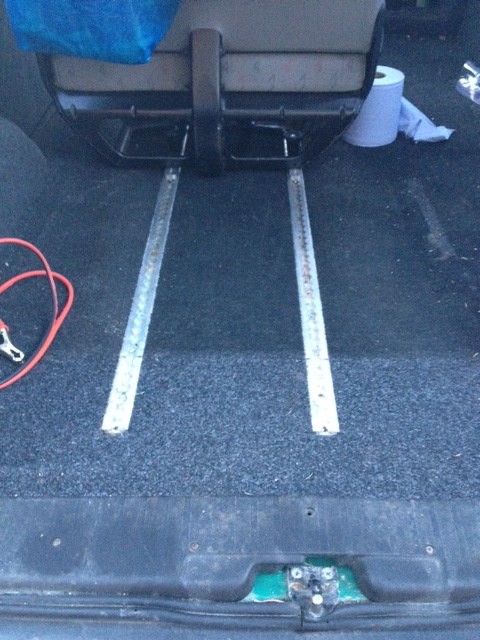
Inside the T4 was fitted with Unwin Rails for a wheel chair locking (it did have a chair lift as well but that has been removed previously)
Tracks-Rear by David, on Flickr
It also had steel plates that a pair of single seats bolted down to on the right. (the double seat you see in the photo is actually the cab seat I put further back out the way)


The layout I wanted would not use the rails and the steel plates were superfluous, so time to remove ...

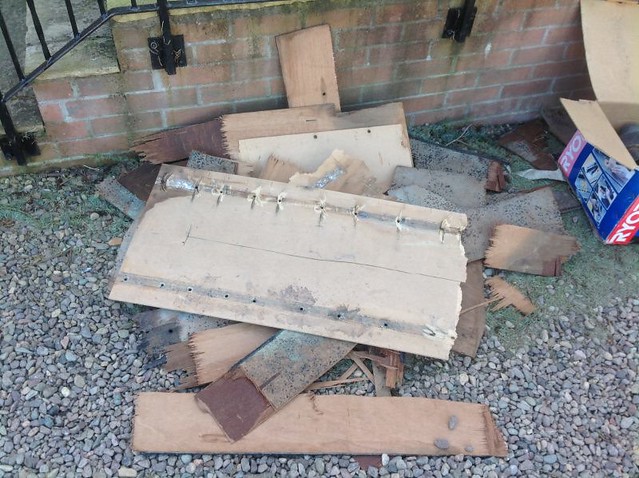
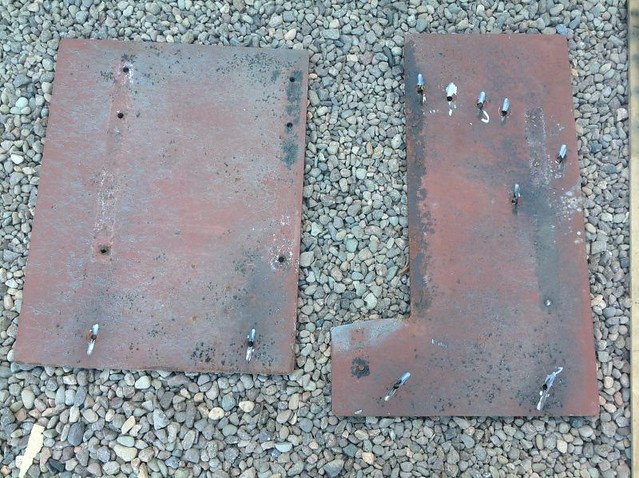
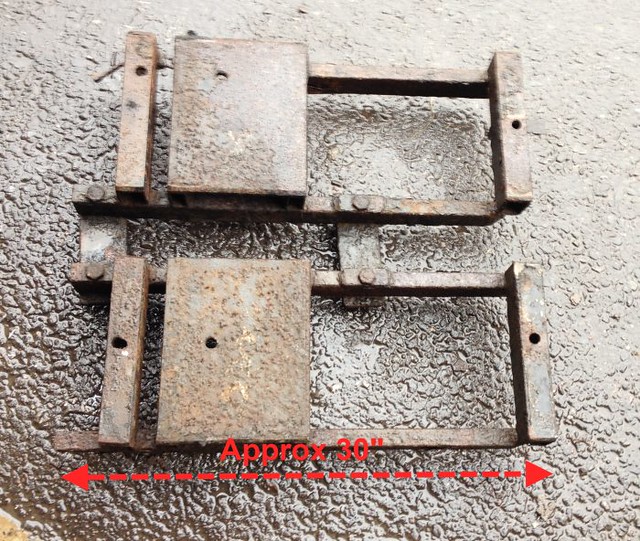
Won't post pictures of the work in progress, but this is what got removed and not needed ....

Ply and MDF
Versa_3 by David, on Flickr

Interior Metalwork
Versa_2 by David, on Flickr

Versa_1 by David, on Flickr

Underchassis Metalwork
Doris_MobilityCarrier by David, on Flickr


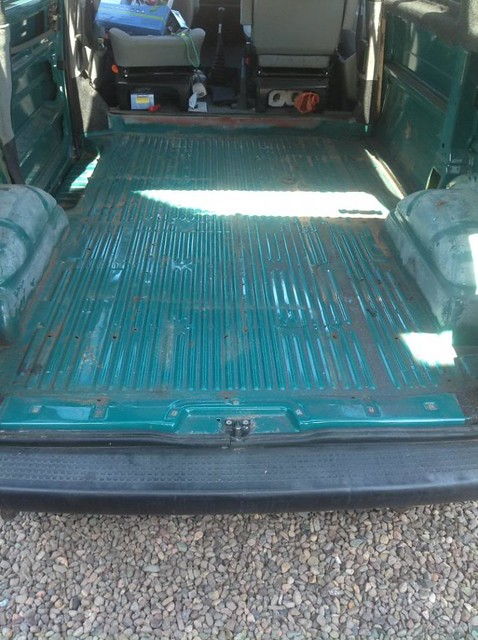
Leaving me with this:
Versa_Floor_4 by David, on Flickr

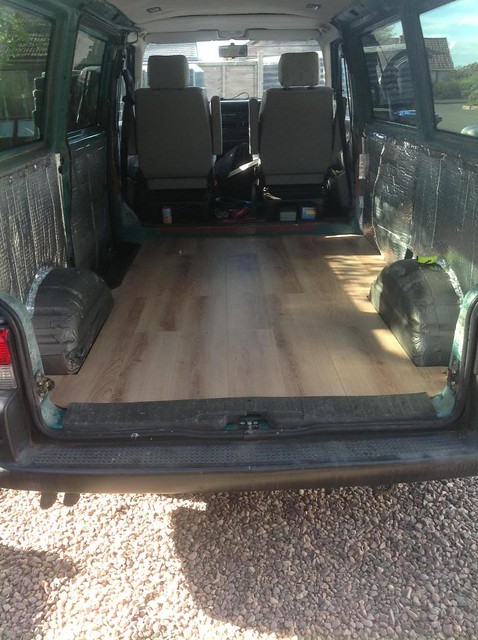
Laid down some plywood and then some B&Q Laminate Flooring
imagejpg1_6 by David, on Flickr
In this shot you also see the pair of Captains Chairs installed - more of that later
 
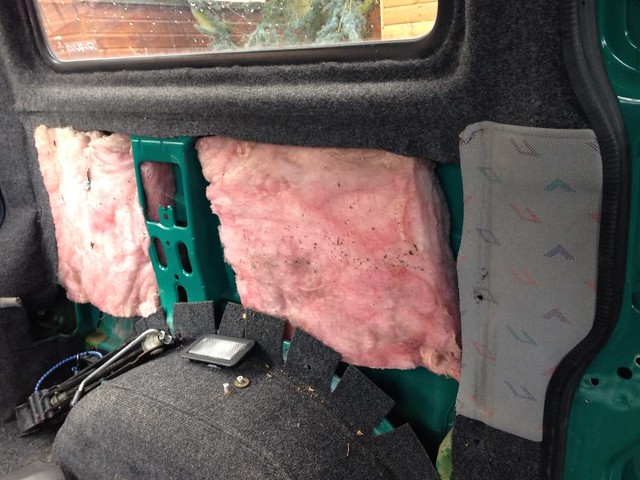
I also removed the side panels (which were hardboard covered with VW Inka trim with a scrim padding) and found this
Doris_Nearside_0 by David, on Flickr

Standard roof insulation which was wet in places (as was the floor as you can see from some of the ply staining)

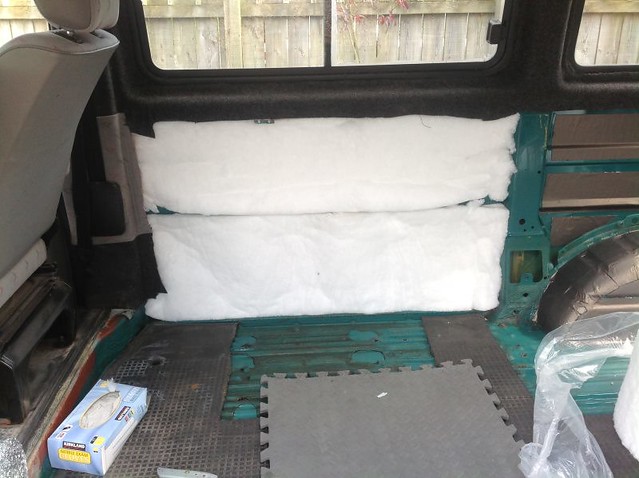
Ripped out all that itchy stuff, added some flashbanding, some recycled bottle insulation - shown below checking for size
Doris_Offside_2 by David, on Flickr

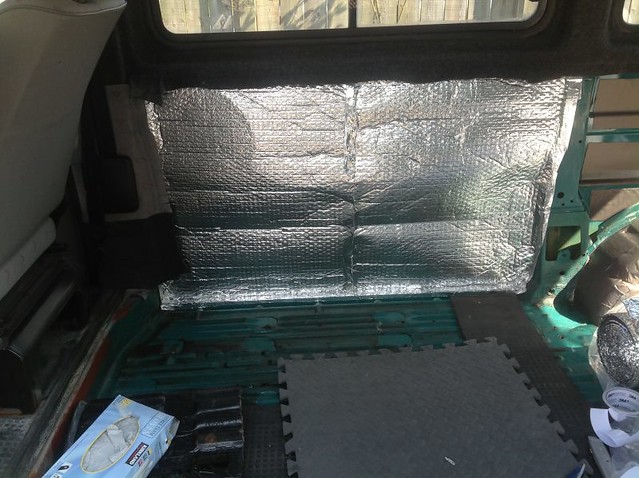
and then double-sided bubble foil
Doris_Offside_3 by David, on Flickr

Then cut new side panels from ply and carpeted (you will see that in a later photo)
 
Layout will be sidebench that extends to a 3' bed, a storage unit opposite and a kitchen pod at the front.

Start of the Bench construction

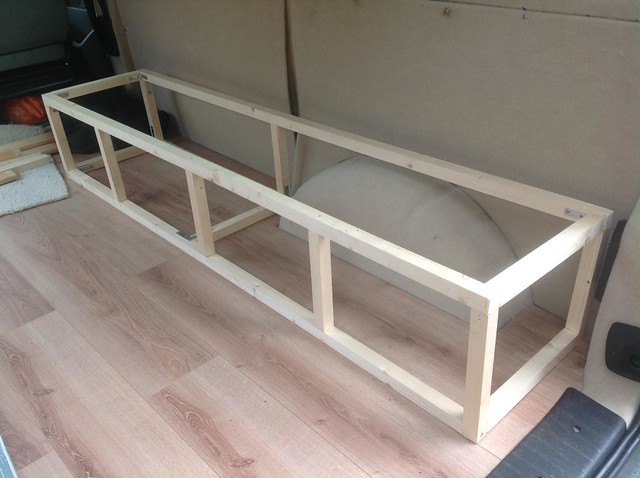
This is the basic frame built
imagejpg1-3_2 by David, on Flickr
You can see the new side panels here (the front one needs some more securing!)

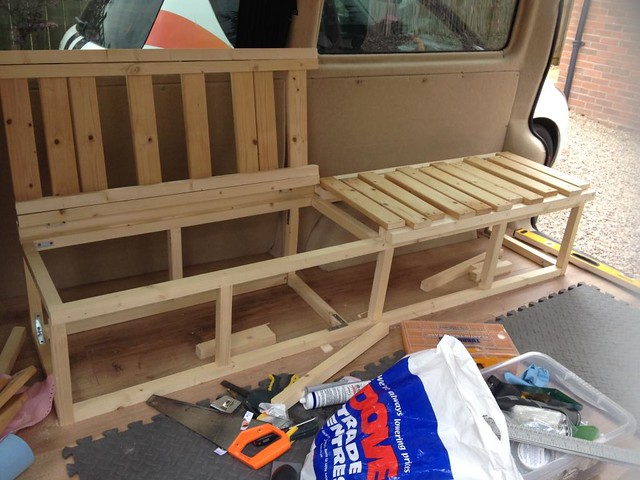
Some more building out
imagejpg1-5_2 by David, on Flickr
(I actually changed all the top slats after this picture was taken for proper sprung bed slats)

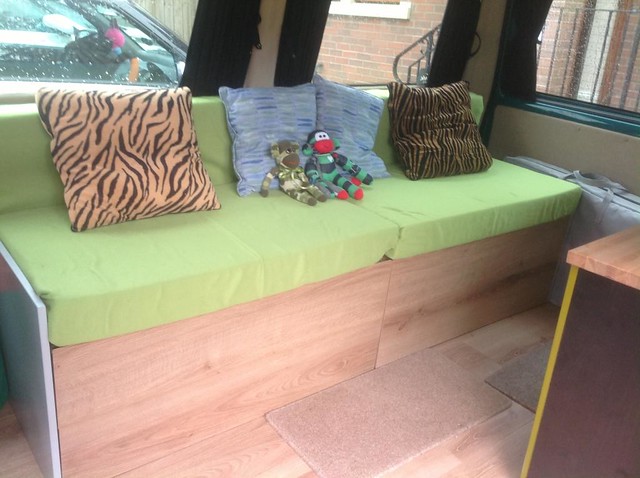
And completed
imagejpg1-11 by David, on Flickr

I am using spare flooring planks for the front of the bench and an IKEA mattress cut into 4 pieces for the base and back cushions.

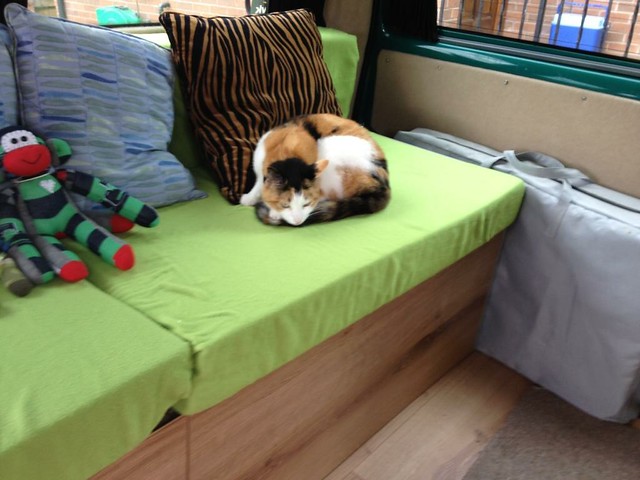
Have to get the cats approval as well of course
imagejpg1-12 by David, on Flickr


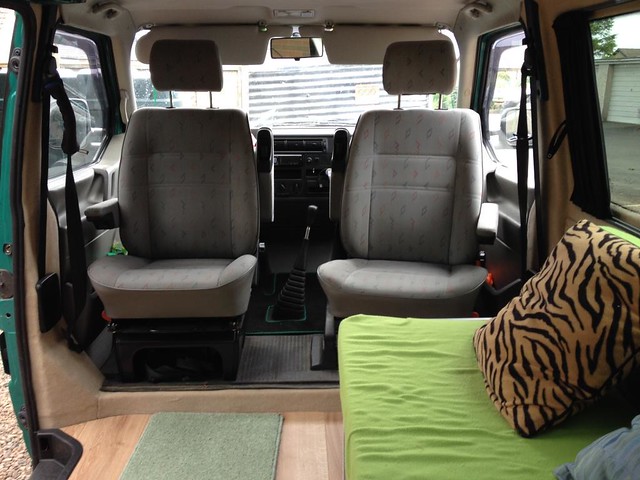
And a view to the front
imagejpg2_7 by David, on Flickr
This is prior to the kitchen pod being built.

You see the two Captains Chairs on swivel plates here - I actually removed and sold the swivel plates quite soon after fitting as they raised the seat base height by a couple of inches and that was enough to make the eyeline clash with the top door frame which was annoying.
It would be fairly easy to chop the bases a little to compensate, but we also found swivelling was a PITA anyway, so I decided to just sell, have forward-fixed seats and recoop (most of) the money from the plates.
The T4 came with a drivers Captain seat and the standard double initially, but the doubles are not comfortable to travel on and I managed to get another passenger captains seat with less then a years use for just £60, which I was really happy about.
 
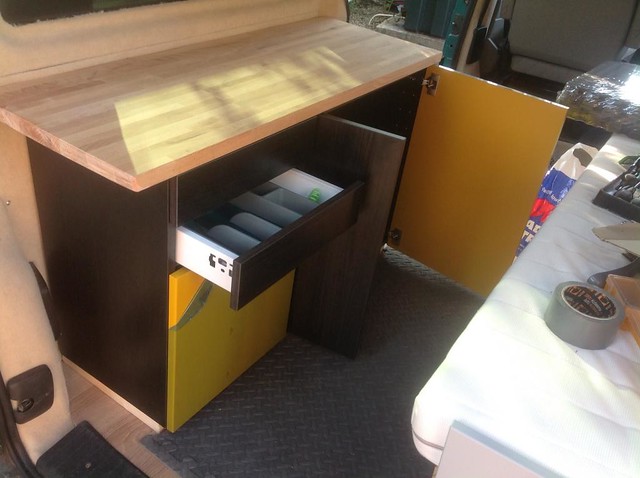
This is the storage unit opposite the bench
38480575621_58e419e731_z.jpg
, on Flickr
100% IKEA and worked very well. The wall units from the IKEA kitchen range are a popular fit in VW campers. Yes, they are heavier then the special Vohinger lightweight ply, but work out to be around a fifth the price, and that works for me!

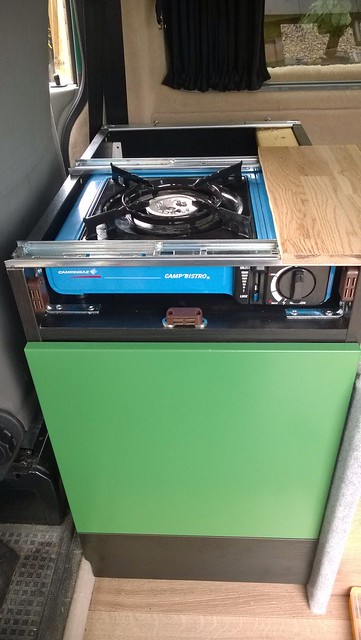
Here is the kitchen pod
38424785696_d090c475f7_z.jpg
, on Flickr
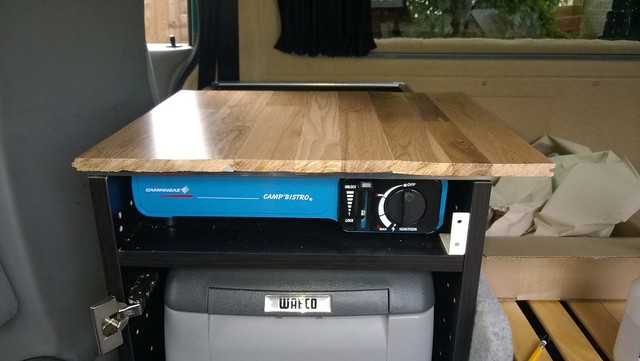
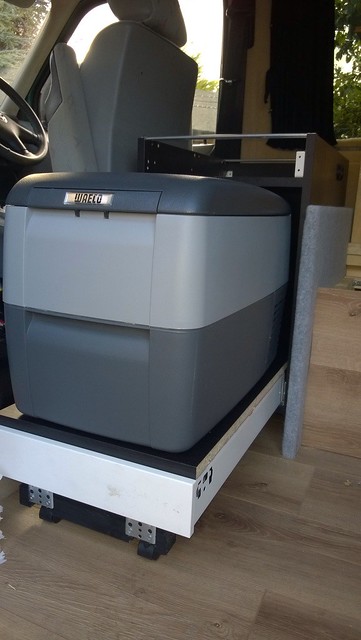
Again it is an IKEA wall unit which I modified to have a pull-out Waeco Compressor Coolbox, a basic £15 cartridge stove that is secured in place by the sliding rails but is stll removable, and a worktop that slides over to reveal the hob

Here is the pod as I get ready to fit the hinged door for the coolbox and the drawer front (attached with magnets) to hide the hob controls
38424789356_f46882a394_z.jpg


How it rolls out to access the CoolFreeze
38425778476_5c8178a7e0_z.jpg
, on Flickr


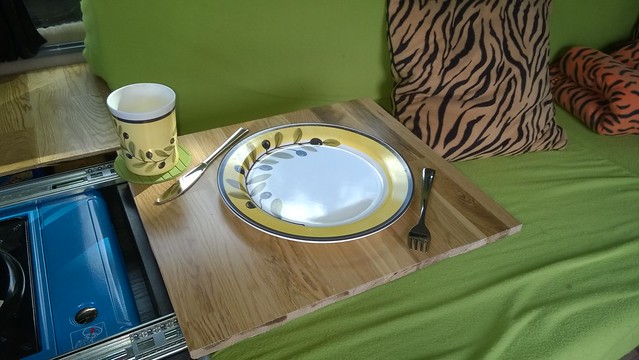
This pod was the final thing I had to do to get the T4 reclassifed from a Panel Van to a Motor Caravan. The worktop when slid along to reveal the hob also became the table (I put a plate, cutlery and a cup on top and took a photo of that to send to the DVLA to show them the "table" in use as well as the hob (only one burner is needed for a Motor Caravan in fact, not two as many people believe).

EDIT: I found the photo I took to send to DVLA ...
image_7 by David, on Flickr

and a few weeks later, I was the owner of a Motor Caravan - my very first one and satisfying as I did all the work myself :D

I will post some of the body and mechanical work in some later posts
 
Last edited:
Bodywork ...
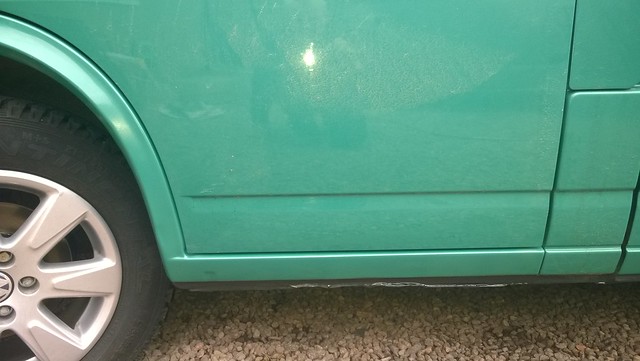
As I mentioned before the bodywork was pretty good for a 2000 T4 with the only work needed around the front sills and wheel arches.

There were two actual holes due to rust. One was inside at the rear due to to a couple of holes drilled to work with the wheelchair hoist not being rust protected afterwards (this is an assumption based on their position and the general poor quality of the Versa conversion). This was fixed by a conversion company when I had the windows replaced (more on that later).

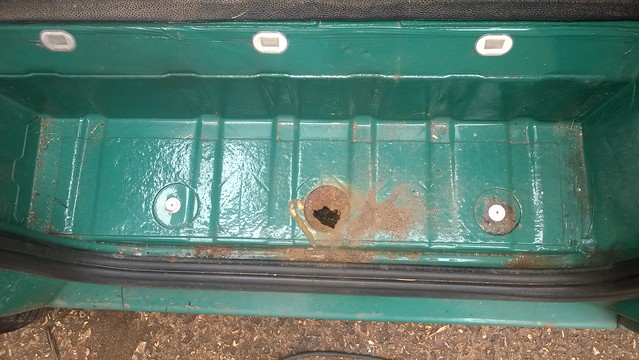
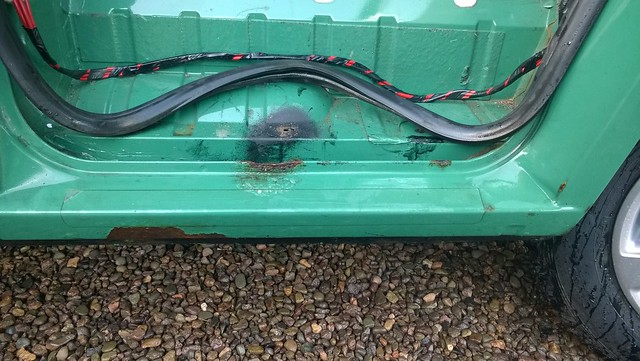
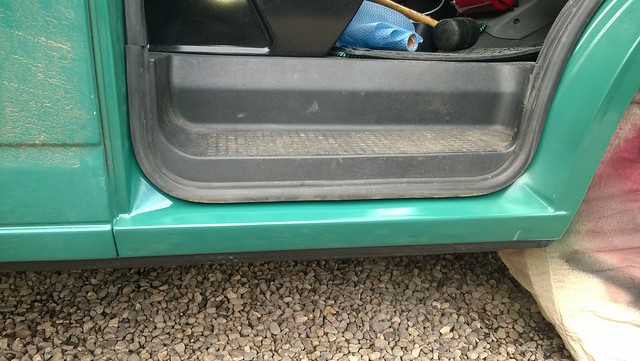
The other hole was on the side step
image.jpg1_6 by David, on Flickr
Looks like one of the peg holes on the step locators for some reason caught the rust bug

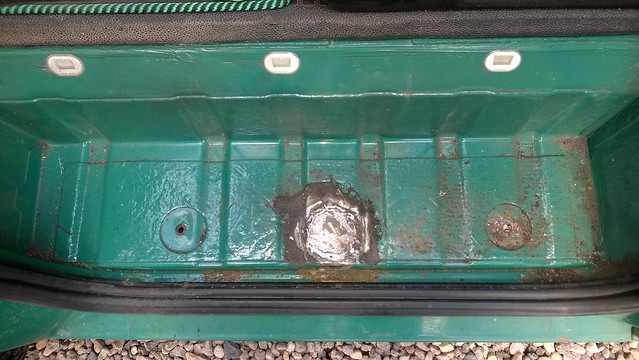
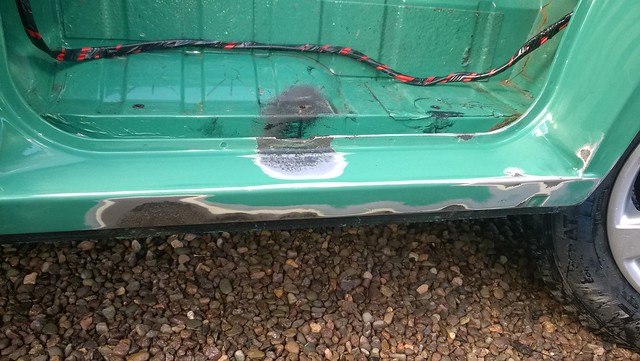
Cleaned that up and got my neice to weld a repair disc
image.jpg4 by David, on Flickr

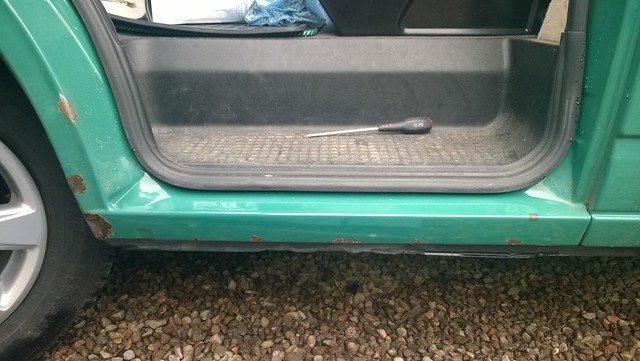
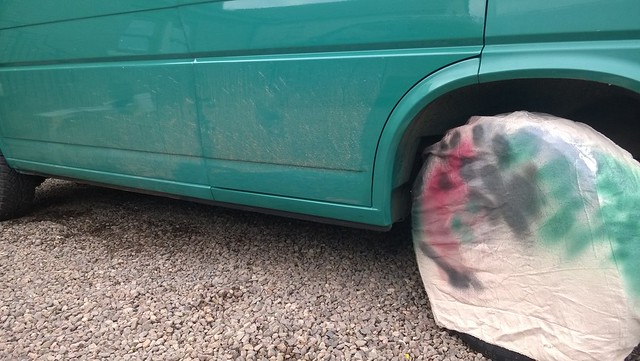
Apart from that inner side step, there was some rust scabbing along the sill and going up the arch a little
image_19 by David, on Flickr

So next step is to give it a good cleanup with my Mirka DA Air Sander and prepare for paint
image_23 by David, on Flickr
(I had previously cleaned the step and used some kruist and then sprayed to protect until I was ready to shoot some colour on the repair area)

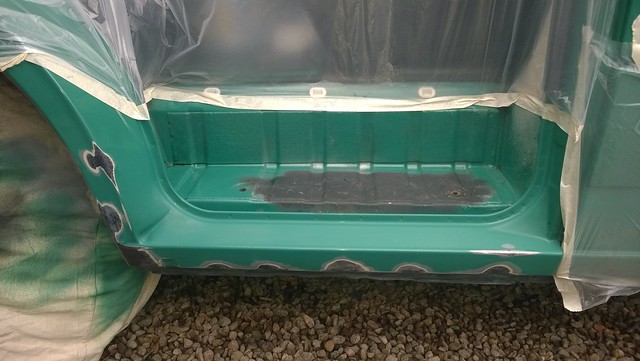
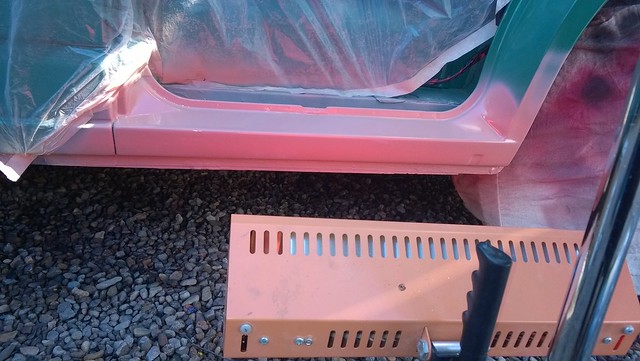
Then after priming and sanding, sprayed the colour coat
image_21 by David, on Flickr

The T4 is finished as standard in a single stage flat colour - Freisian Green - so I chose to use a cellulose paint that needed no top clearcoat to give the closest technical as well as colour match.
The next series of photos are of the other side (a similar situation) and shows the primer stage more clearly

Rust
image_13 by David, on Flickr

Rust Sanded Back
image_12 by David, on Flickr

Primer laid down and curing using an IR heater
image_14 by David, on Flickr

Colour Coat laid down and step cover replaced
image_15 by David, on Flickr


Pretty nice colour match I think
image_16 by David, on Flickr
(The door has not been touched, just the sill below and the lower part of the arch)


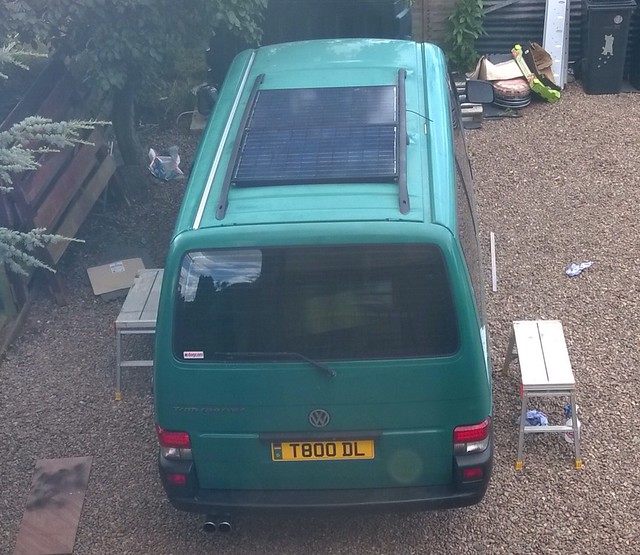
Quick view of the solar install on the T4...

image.jpg1_8 by David, on Flickr

Fitted a pair of 80W panels mounted onto a pair of roof rails I fitted to the roof. thise route down to a Amperor Associates PI25C Power Integrator which does split charging, starter battery trickle charging, multi -stage battery charging including battery reconditioning and is also an MPPT controller, all in the one very well priced unit.

The silver strip to the left is a C-Channel awning rail which I used with a Kyham Sun Canopy
 
I talked earlier about wet insulation ... this was due to the windows leaking.

And the windows leaked due to the poor conversion by Versa. basically they cut the holes too big! you could see into the van through the gap between the metal panel and the rubber beading. no amount of window sealing can fix that so I had all the side windows replaced with bonded versions. This is the only piece of work I subbed out to a third party.

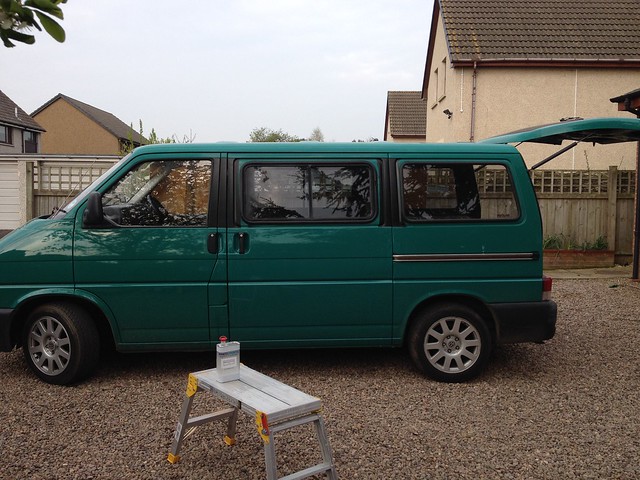
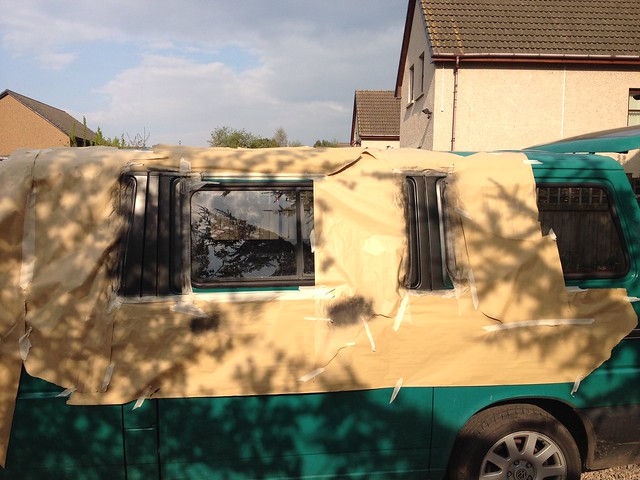
I did do some prep work myself first though. I bought heavily tinted windows to fit and I wanted a modern look to the van, so I painted the window pillars beforehand.

The size of the windows meant it was quite easy to do, so I just masked off top and bottom and sprayed (after suitable prep of course)
IMG_0638 by David, on Flickr

I didn't worry about paint getting on the old windows as they had no future use, and after paper removed, we have this look
IMG_0644JPG2 by David, on Flickr

looks a bit gash at this moment, but once the windows are in, it all comes together
imagejpg5 by David, on Flickr

 
You may have spotted different wheels in the picture above?
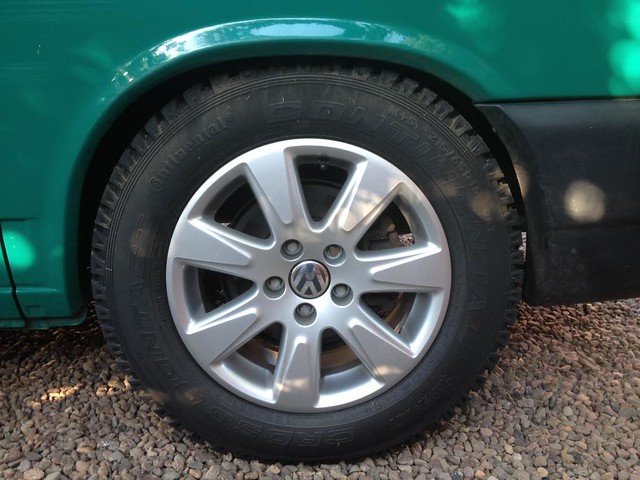
I said earlier the wheels and tyres were not upto par - so I got some VW Passat Wheels with the suitable load rating, got some Continental Cross-Contact AT Tyres to go on them, complete with a TPMS system and we are good to go in safety

24608661558_74cd59a98b_z.jpg
, on Flickr

You might notice the tyre is quite close to the bumper and arch top? This picture was taken just after I fitted the wheels and before I replaced the rear springs and wound up the front torsion bar (the picture in the previous post is a better view of the stance - taken after springs done and before torsion bar)
 
Last edited:
Now mechanically the T4 gave me very little trouble.

Quite early on in my ownership, I got a brake warning light come on. Now the brake pads had been replaced around 3k miles earlier, and also the T4 pad warning system is renowned as failing and giving false readings, so I didn't take it that seriously until I noticed one rear wheel was a bit hot.

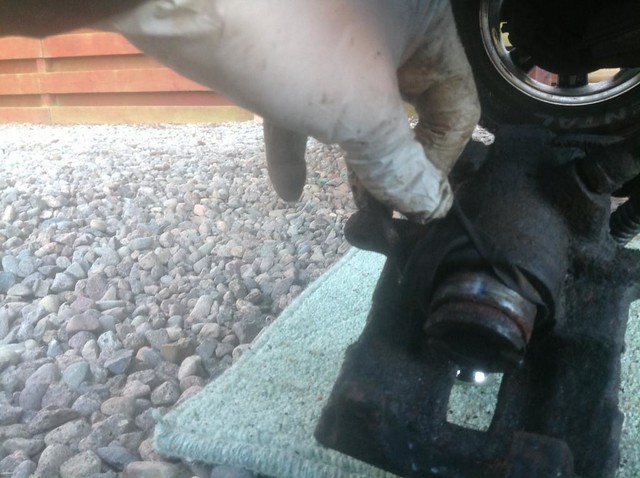
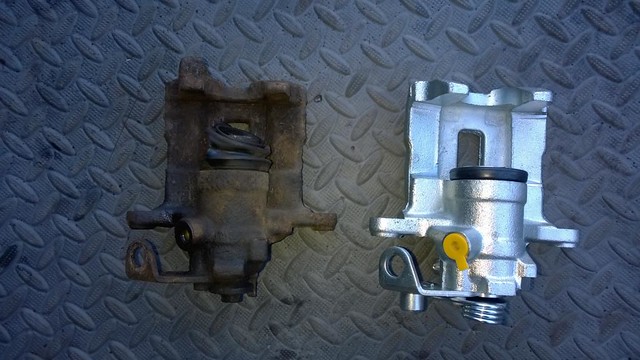
Took the wheels off and saw one pad was heavily worn (not good!) so took the caliper off the carrier and found this
26704719819_d510f215bf_z.jpg
, on Flickr

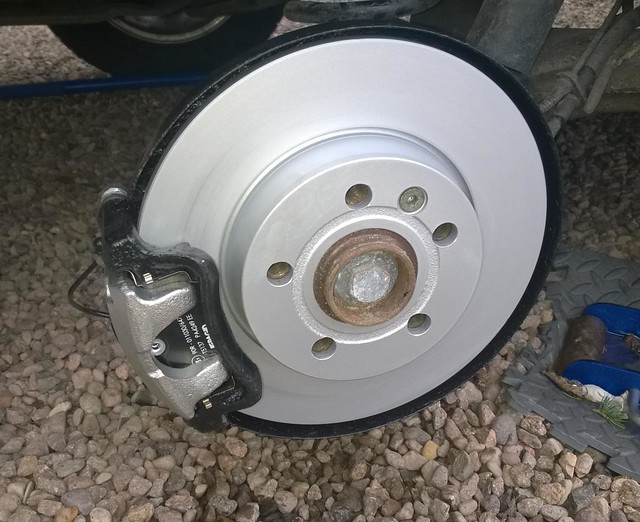
Not to clever :( went on line to get prices for rebuild kits and found I could get a brand new caliper for not much more then a rebuild kit, so a bit of a no-brainer
38424760406_c811895495_z.jpg
, on Flickr

I also replace the slider pins on both carriers while I was at it.


Out of interest, when I had the MOT done a year or so later, I had an advisory for the front discs being pitted, so I decided to replace those discs, pads and slider pins again as part of my pre-sales vehicle prep
26704703869_610c33ff23_z.jpg
, on Flickr

The only other work I did myself was remove the EGR pipe and blank off the valves as it did nothing useful other than take a couple of precious BHP away. Nothing else really needed attention other then regular servicing.

I had the Exhaust replaced by a specialist who fitted a very nice full stainless steel system, and the cambelt replaced (again as part of the pre-sales prep) by my local VW Specialist.
 
Last edited:
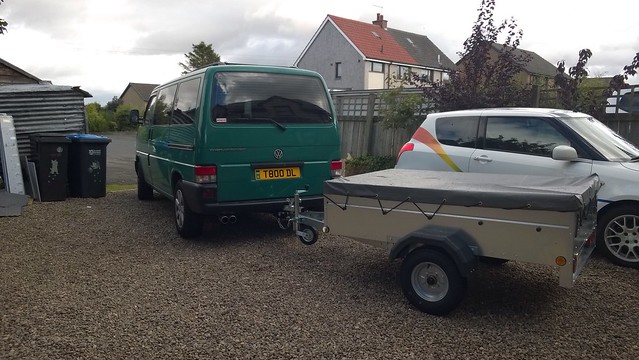
Off to a VW Festival with my Caddy Trailer ....
image.jpg1_20 by David, on Flickr

Used the T4 from Autumn 2013 until I sold in Spring 2016 and it was a nice little campervan and good fun to drive and weekend in.

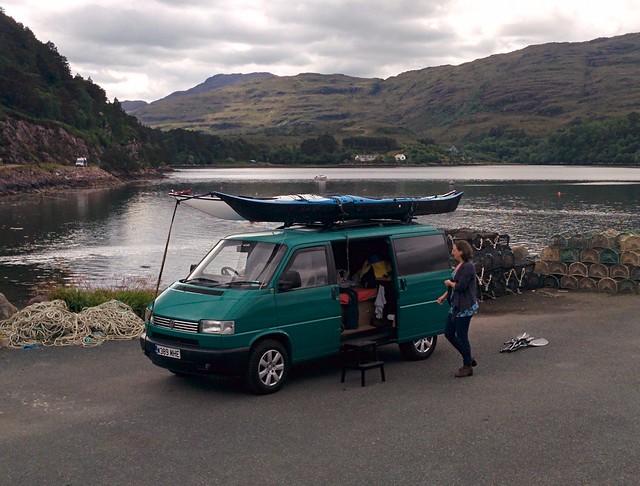
Sold it to a couple from near Aberdeen who sent me a picture from one of their trips
image_25 by David, on Flickr
 

Users who viewed this discussion (Total:0)

Back
Top