Swift bathroom swing wall.

A bit of a sledgehammer to crack a nut but a cheap option, I'll get the Vernier onto one and see how close they get.
 
I went through some of this last winter. I hadn't drained the tap and pipe properly, it froze and pushed the pipe partially out. As I think you've discovered the steel pin holds the pipe fitting in, when that's pushed out they come out easily. It shouldn't be possible to pull them out (or put them back in) with the pin in place, so I was relieved to find that there was no permanent damage.
The seal is a standard O ring, should be easily obtainable from any plumbing store. I think my box of assorted ones came from Lidl.
 
I'm just searching the house for my Vernier, I used to keep it safe in the van as Liz leaves my stuff alone in there, but I had to measure something a while ago and it stayed in the house and of course "she" hasn't seen it.
 
I'm just searching the house for my Vernier, I used to keep it safe in the van as Liz leaves my stuff alone in there, but I had to measure something a while ago and it stayed in the house and of course "she" hasn't seen it.
It will turn up in 3 years hidden in the bottom of a drawer somewhere, and then they say oh thats what you were talking about, why did you not say. :mad:
 
Yeah, I ordered another on Amazon it'll be here tomorrow, cheap as chips for a digi one.
 
New Calliper arrived last night, the accuracy supposedly is better than the 15 year old one 0.01mm v 0.02mm.

So I've measured it all up and I think the old O rings are still very usable all within 0.05mm ID, OD and thickness, it's low pressure so why not, I'll fit it back together and leave it a few days just to make sure with pressure on and keep trying the pump to make sure then I'll bang it all together properly, I need to paint the damaged wall anyway so no rush.

Liz has blagged the car so I'll go down to B&Q in the van, then the spilled water can drain out too and let it dry out.

Why don't vans have all the drains either central or work with the same lean. Shower has to be high front left, kitchen has to be high front right, if the van is plumb level neither fully drain as it is nose down.
 
Swift got back to me with the actual part details and the supplier just now, to be honest from all the negative forum chat about Swift I was surprised they even responded let alone tried to help, so well done them.

No stock but thought I'd post the details just in case it helps someone else.

1055653 TAP-VANITY/SHOWER CHROME-350MM TAIL
 
hi. bit pricey but would this do the job .cheyenne
 
Not too bad for price really these days and it looks like it might fit but I got to thinking it was only leaking due to bad design or an ape having a shower the secure parts didn't leak so I'm just putting it back as was but with no sealant and it will be ok I hope.
 
Not too bad for price really these days and it looks like it might fit but I got to thinking it was only leaking due to bad design or an ape having a shower the secure parts didn't leak so I'm just putting it back as was but with no sealant and it will be ok I hope.
hi. that's even better still being able to repair the original parts .if it was me i would us Sikaflex around the joints because it sticks like shyt on a wooly blanket it would give extra seal & strength . cheyenne
 
No sealant or adhesive, it wasn't designed to have it so there is no space for it to go, and perhaps it would seal in a problem until it caused water damage which I think I've been lucky to avoid.
 
One of the hardest bits to do was getting the old splattered everywhere sealant of the tower part, that alone has taken two days on and off.

Need to concentrate on painting the wall next, I got a close mix from B&Q yesterday they only do matt in match pots so I'll give it a quick coat of satin oil based over where the paper has torn and I got some slightly broader panhead screws for refitting the now strengthened tower.
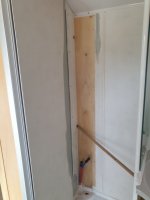
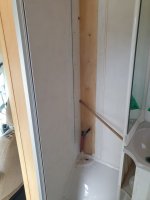
hi. that's the problem with m/h walls plywood covered with paper to keep the weight down .we found the best thing to patch up with was sticky back vinyl in different shades . https://www.diy.com/departments/d-c...OgGOEAQYAyABEgKDKvD_BwE&gclsrc=aw.ds.cheyenne
 
Too awkward to repaper so it'll get painted.
 
I have a small mark behind the woosh-bang sliding door, that the paper solution suggested could be perfect for.

Thank you Cheyenne!
 
This stupid little job is annoyingly taking forever, I went down yesterday and gave where the paper had torn three coats of some light grey car paint I had, brushed on so quite thick, I gave it a quick rub down this morning and put on the first coat of white to match the rest, it'll need a few coats, I forgot to get a 4 inch (100mm) roller as it'll look better than brushed, but it is quite dark in there so it'll have to do.

1688811239946.jpeg
1688811271524.jpeg
 
I put the shower tower back up today and connected the pipes, no leaks thankfully, but the swing wall squeaks now 🤣 I just need to finish painting the wall now, I did a bit and it looks okay.
 
  • Like
Reactions: 2cv

Users who viewed this discussion (Total:0)

Back
Top