Is this worth buying?

I'm just waiting to find out if the MCEA engineer actually wired in the VB at all, as the controller is obviously charging the LB fine, if they haven't then I'll take it across for them to do the job properly, if they have already done it I suppose wire could have come adrift or maybe a setting as it's an awful manual, I left it on auto hoping it would just get on with it.
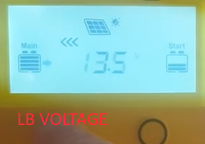
put a meter on the controller terminals for the starter battery. That will tell you. Some of those dual controllers are rubbish. I replaced one with a Victron MPPT + AMT12 for a forum member a little while back.
 
I'll do that tomorrow. I recall you saying it was a decent one at the time though David.

Looking at the manual, this could be the issue this time of year .....
BATT 2 = Starter, BATT1 = Leisure.

Condition 1: BATT2 starts charging when BATT1 reach the float charging stage and the BATT2 voltage is lower than the “Charge Return Voltage”. Condition 2: BATT2 starts charging when the total available charging current is higher than 3A and the BATT2 voltage is lower than the “Charge Return Voltage”
CAUTION: After the BATT2 charging is turned off due to the stop charging conditions, it will be recharged only when the start charging conditions are satisfied again
I read the caution sentence as meaning BOTH conditions must be satisfied, not just one or other.

3A of charge current means you need to be harvesting 40W minimum. V * A = W. Voltage must be a minimum of 13.4 (13.4V being float voltage which must be attained) * 3A = 40.2W. 40W for any useful duration in Winter on a solar array under 200W is a big ask I reckon.
 
Not sure about either of those options for my van.

I already have an MPPT controller to charge the VB & LB but not enough sun for it to do it at this time of year, we seem to be in cloud 6 days out of 7, the EHU is too expensive and doesn't charge the VB only the LB so I'm thinking (mentioned elsewhere) to have the EHU on a timer for one hour per day, and then plug in the VB to a charger plugged into a hab socket.

So the OP question remains, bear in mind I'm not able to go crawling about running wires etc.
Just put the wiring & switch i posted on the van and stop your wingeing, strange thing is my solar and votronic unit is doing the job so far, and my I say we live in a dark dank wet as hell place. :(
 
Just put the wiring & switch i posted on the van and stop your wingeing, strange thing is my solar and votronic unit is doing the job so far, and my I say we live in a dark dank wet as hell place. :(
You need to read peoples responses Trev.
 
Looking at the manual, this could be the issue this time of year .....
BATT 2 = Starter, BATT1 = Leisure.

Condition 1: BATT2 starts charging when BATT1 reach the float charging stage and the BATT2 voltage is lower than the “Charge Return Voltage”. Condition 2: BATT2 starts charging when the total available charging current is higher than 3A and the BATT2 voltage is lower than the “Charge Return Voltage”
CAUTION: After the BATT2 charging is turned off due to the stop charging conditions, it will be recharged only when the start charging conditions are satisfied again
I read the caution sentence as meaning BOTH conditions must be satisfied, not just one or other.

3A of charge current means you need to be harvesting 40W minimum. V * A = W. Voltage must be a minimum of 13.4 (13.4V being float voltage which must be attained) * 3A = 40.2W. 40W for any useful duration in Winter on a solar array under 200W is a big ask I reckon.
Ctek it is then, but will it have to be on full time or can I use a socket timer?
 
I have a few timers, I wasn't sure if it had to be on full time or not to be honest.

I just took a little video of the controller, totally meaning less to me I'm afraid.

 
I have a few timers, I wasn't sure if it had to be on full time or not to be honest.

I just took a little video of the controller, totally meaning less to me I'm afraid.

You need to look at two things on the display each time you hit the button.
1) The number shown
2) An icon that tells you what that number is linked to (PV Panel; Main/LB/BATT1 Battery; or Starter/BATT2 Battery)

This is the list of icons:
Cont-ICONS.png


And YOUR Info ....

These arrows show you where power/current being harvested is going (no arrow there, no power being sent)
PB-A-Flow.png

Then details ....

From Solar PV Panel:
Voltage, Current and Power
PB-V-PV.pngPB-A-PV.pngPB-W-PV.png
And Cumulative Power from the PV Panel since controller installed (or last reset)
PB-WH-PV.png


For the Leisure Battery, Voltage and Current
PB-V-LB.pngPB-A-LB.png
It also shows the Temp of the Battery (must have a probe connected, or it might be the temp of the controller itself otherwise). And the lowest voltage of the Leisure Battery
PB-Cel-LB.pngPB-Vmin-LB.png
And this would be where you select the type of Leisure Battery from Preset options I would guess
PB-Type-LB.png

And the Starter Battery ....
PB-V-SB.pngPB-A-SB.png


As a dual controller in the Winter, I don't think this will be much use maintaining a Starter Battery due to the turn-on conditions. It is clearly much more focussed to the main job of charging the Leisure Battery.
I've not used one of these controllers, but actually given the price of them and the way the information is laid out and available it looks a nice bit of kit and I would think in the summer, it would do a good job of looking after both batteries.
 

Attachments

  • PB-V-LB.png
    PB-V-LB.png
    30.7 KB · Views: 3
Last edited:
Thanks for that David, must have taken you some time to do all that (shame I can't credit it to you on Trust pilot innit) the Ctek arrives today so I'll plug it in 24/7 for a week and see what it uses, and if it's a lot then I'll set the timer.

As it's a 5a charger it surely can't use that much power once the VB is fully charged.
It won't. A quality charger like a CTEK will have a very low self-drain and also treat the battery right.
Some typical Motorhome chargers (such as the one in my Sargent unit for example) will just put out a constant voltage which will both not charge a battery fully whilst ALSO be bad to leave on all the time as the constant voltage is at too high a level for the battery long term.
 
Thanks David I was just on the phone to Ctek via https://www.rotronicsbms.com/contac...cu39bE03Rdn39KoJlvEEJ368FpN-92mIaAr-eEALw_wcB as they seem to be the UK contact, technical said it's ok to have it on only a couple of hours a day once it's got the battery to it's upper charge level, and I don't need to discinnect from the terminals to start the engine just unplug it from the mains.

As you say it's a good bit of kit, I had the same one on my selfbuild and even with 330ah to deal with they were always fully charged as it arrived on the drive from long trips so it just had to keep them toped up.
 
Ctek arrived, Gone up a tenner since I odered it, 8 pages of instructions and a 5 year warranty.

If it's not persisting down tomorrow I'll move the van and fit it.
 
Phew, damned cold out there this morning, 3c foggy and raining but I got the Ctek fitted, 12v leads just long enough to be accessed after it's all buttoned up, 230v side of it could have used a longer cable but it'll suffice.

I have made sure that once the floor is bolted back down the cable can't short out, I had to put the leads to the right of the seat, I'd have prefferred to go door side but again not long enough, but it's all connected up and switched on.

First pic was 09:12:55, second was 09:33:48 21 minutes, not too bad for very cold arthritic hands & hips and a very bad back, two trips up to the garage for bits, and I also have have acid burns to my finger tips, don't ask.

1669801417222.jpeg


1669801449529.jpeg
 
You have to be vary careful connecting on the positive side, as the bolts are only captivated in the plastic below and can shear the plastic and then it's a real pain to tighten them up, been there done that.
 
Phew, damned cold out there this morning, 3c foggy and raining but I got the Ctek fitted, 12v leads just long enough to be accessed after it's all buttoned up, 230v side of it could have used a longer cable but it'll suffice.

I have made sure that once the floor is bolted back down the cable can't short out, I had to put the leads to the right of the seat, I'd have prefferred to go door side but again not long enough, but it's all connected up and switched on.

First pic was 09:12:55, second was 09:33:48 21 minutes, not too bad for very cold arthritic hands & hips and a very bad back, two trips up to the garage for bits, and I also have have acid burns to my finger tips, don't ask.

View attachment 65117
You added the thick red lead on the left with black heat shrink? or the thinner red wire with the red heat shrink above it?
Either one, you MUST get a fuse close to the battery on both of those cables ASAP (especially the thicker cable - The way it is resting on top of the battery clamp with what looks like some thin heatshrink between the copper in the cable and a chassis ground is rather worrying :( )
You better tell Swift Trev, that's a before picture, mine are well insulted.
 
You better tell Swift Trev, that's a before picture, mine are well insulted.
Who's Trev?

It won't be Swift who will have deal with the consequences of a direct battery short, is it? I actually doubt if Swift did the cabling like that - maybe a previous owner.

Your choice if you correct it or not.
 

Users who viewed this discussion (Total:0)

Back
Top