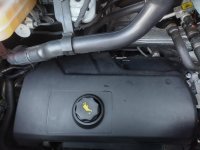
What did you do to your van today?

Twenty lashes? Better have lots of mascara and eyeliner for counterbalance ... [nicked from 'Round the Horne' c1967] ... :D

Steve
You can join Trev in the naughty corner and smack each other's bottoms as punishment for picking on poor little Oppy
 
Replaced the Thetford toilet switch circuit board on my c260(263) sw, the extractor fan was not running, it had been running at variable speeds but eventually stopped. The panel gave a constant, very quiet squealing sound. Thought it was the fan but on watching a you tube video on robs wise ways channel, he had dealt with the exact same problem. The obvious issue was the fan, but after buying a fan he still had the same issue and solved it with a new panel. Saved me a decent chunk of money. Easy to swop out panel but obtaining the replacement was a pig. Thetford site and parts lists not model specific. 3 possible expensive panels to play roulette with. No contact numbers for Thetford and local dealers and agent, although helpful, could not identify or easily obtain part. With much research I sussed out the correct part (93405) and found only one replacement on the web.
Arrived today and fitted in minutes. What’s next, I wonder?

Davy
 
Right, as promised here you go...
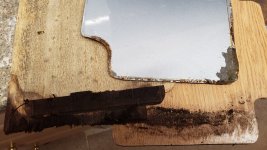
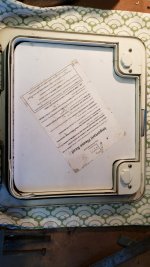
Old panel and infill, note blackened damp area and rust on outer panel
20220121_102822.jpg
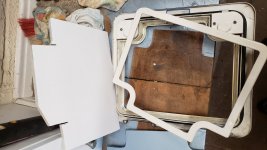
Disassembled frame, cleaned of old sealant
20220121_102941.jpg
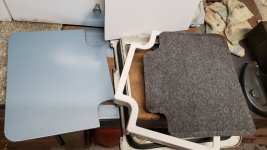
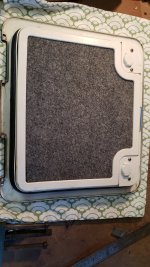
New panel ready to use
20220121_103008.jpg
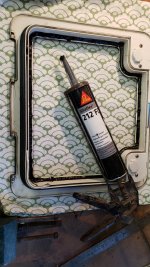
Sealant applied
20220121_103939.jpg
Panel in place, note label ref shower board used
20220121_104041.jpg
Infill, finish and inner frame attached
20220121_104520.jpg
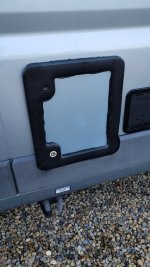
Back on van
20220121_105140.jpg
Excess sealant will be removed later when it has set a bit.
Pleased with job overall
K ;)
 
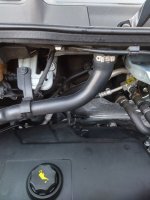
Had a middle drainage vent blockage in late July, caused by fallen leaves, which I could only clear by breaking the seal at the 1/2 way union over the Rocker Cover [left of the rubber bracket]. Ever since, the rainwater has seeped out onto the Rocker Cover, a few drips at a time. Broke the seal again today and applied a generous layer of food grade silicone grease [guaranteed not to wash off] on the junction piece and the internal surfaces of the lower half of the drainage pipe. Didn't work first time when I poured a generous amount of water down the drainage vent, but applying a more generous coat of grease to the surfaces appears to have done the trick

Steve

Engine Bay Rust Water Stain 3.jpgEngine Bay Rust Water Stain1.jpg
 
Right, as promised here you go...
Old panel and infill, note blackened damp area and rust on outer panel
View attachment 61971
Disassembled frame, cleaned of old sealant
View attachment 61972
New panel ready to use
View attachment 61973
Sealant applied
View attachment 61974
Panel in place, note label ref shower board used
View attachment 61975
Infill, finish and inner frame attached
View attachment 61977
Back on van
View attachment 61978
Excess sealant will be removed later when it has set a bit.
Pleased with job overall
K ;)
I used some 3/4" polystyrene slab in my self build loo door, made a difference.
 
I'll get a good dal of stuff in ours today, ready for our 2 months away starting on Monday.
woohoo.gif
 
Sat inside while Dave washed it in the local jetwash place.... he was wearing wellies and overalls! Roof looks good after wet and forget applied a couple of months ago, so didn't have to touch that. Filled with water, topped up the clothes cupboard, and checked enough food for meals en-route. Checked lists, paperwork and passports....again! 😊
 
Sat inside while Dave washed it in the local jetwash place.... he was wearing wellies and overalls! Roof looks good after wet and forget applied a couple of months ago, so didn't have to touch that. Filled with water, topped up the clothes cupboard, and checked enough food for meals en-route. Checked lists, paperwork and passports....again! 😊
Me: 'Got the passports and the currency?'
Elaine: 'Yes, as I had on the 3 previous times you asked ...'

45mins later; 'We did pack the passports and the currency, didn't we ...' And then we play 'You know what we forgot?' for the rest of the journey, and with it being 500 miles to the Ferry Ports, we usually have quite a list by the time we arrive at Newhaven ...

On our last outward trip to Spain in 2020, we called into our French hovel en route overnight and, for reasons best known to me, I brought the document folder [V5, MOT, Insurance, Breakdown Cover etc] into the house. 36 hours later, at about 0530, I woke up in the caravan with a start; 'I don't remember putting the Folder back in the car...' And that's how I know that the return journey from Bordeaux/Vendee/Bordeaux is 352 miles ... :D And just to make the trip memorable, when we arrived in Spain, I had a heart attack [thought I should have one before Elaine did ...] :rolleyes:

Steve
 
Just painted new steps with 2 pack primer hopefully I’ll get top coat on later today .

Ps just put a second coat of undercoat on so might not get the top coat on today4E12F66B-E827-480A-9AB4-6EC44CBB7AE6.jpeg
 
Last edited:
As you can see I am fitting two steps, one below the drivers door and one below the passenger door. The reason being the step up in to the footwell is now 20in as I've put 40mm spacers to the top of my new struts and springs and really do struggle stepping up into the van. Once these new steps are in place it will only be a 12in step up then 8in into the footwear so it will make our lives a bit easier. Yes I know they will stick out but I have checked and as long they don't stick out beyond the wing mirrors it's fine.
PS I don't think I'm the only one with this style of van who struggles to get up into the cab
 
Last edited:
Back
Top