What did you do to your van today?

Another Kitchen adjustment made was changing the undercupboard light....
Originally fitted was a short light that illuminated the worktop. I am guessing going by the shape of the diffuser this was originally a Fluorescent light fitting and had sometime in the past had the tube fitting replaced by an LED strip within the fitting. Worked well, but was a) pretty short and b) pretty bulky. The space it took up was important as it stopped me fitting a kitchen paper towel holder, and just removing the light to make the room would lose a useful light source.
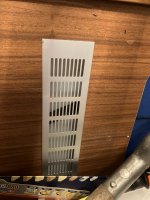
So removed the light unit and fitted an aluminium strip holder instead, using the same power connections within the cupboard.

Kitchen light by David, on Flickr
This is 1M in length, so at least twice the size. The old light had the on/off switch built into it, so had to add a separate switch which was simple enough to do.

Now I have this, I can fit the Towel Holder I had in mind, which is quite a neat one actually and not so obvious as a holder when no towel is there...
81U561R5xBL._AC_SL1500_.jpg
61YcP5JwNHL._AC_SL1500_.jpg


Looks like this in my Motorhome and with the new strip light set back, the counter is still illuminated pretty well

Towel Holder
by David, on Flickr

I wanted something that was fixed but did not stand out when not in use. I can also use the two ends to hang things on as well. Maybe bunch of bananas or bag of fruit, that kind of thing?
This is the link to the holder - Prodyne Under Cabinet Paper Towel Holder, Silver and Black Small . Note if interested that the price shown is £17.06, but you click on "Other Sellers" link on the right and you can pay instead from £4.42 including free postage, which is a pretty decent price for something like this IMO (when I bought mine a month ago I paid £4.67).
Also note while it is described as "small", you would need to get typically "XL" length paper towel rolls.
 
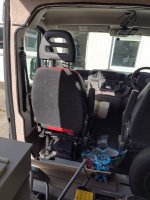
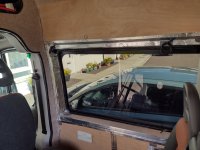
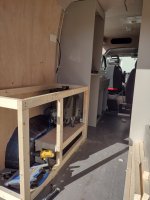
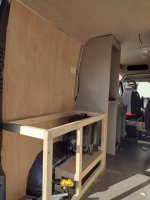
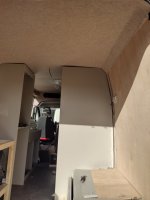
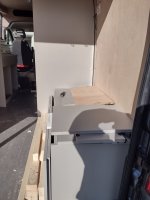
well over last three weeks started building the interior of van, after (nervously!) cutting the side panel out for the new seating area in the van. This one is being built in my fiat Ducato van, using a kit from Squarehaus. Apart from yours truly tripping over his big muckle feet and landing atop one of the rear bed boxes (ahem bits everywhere!! - nae suprises there you'd be in bits too if I landed on you!) Yesterday saw me start the rear bed boxes (reinforced!!) with both framing and existing kit wood. All going well, heater now sited (Truma water and hot air via the lpg) Gas locker constructed almost and battery box almost completed also. Long way to go yet but getting there as they say!
Aye meant to do it ! But failed miserably 😂🤣also forgot to do before ones and during but here is where I'm at now will try to do better ( as my old teachers used to say!). After removing everything when bought it started by relying walls in 6mm ply and ceiling in 3mm ply. All insulated with up to 2.5inches of insulation and damp barrier lined. Then....
1) removed double front seat replaced with single! (Ouch could buy a hoos wae whit they cost!! Lol)
2) using double seat with seatbelts removed to avoid MOT issues. For seating area.
3) nervously cut out window and inserted one from Vanpimps ( very good price and helpful too) leaked at outset but all sorted now!!
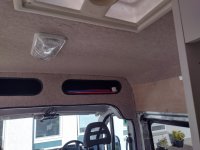
4) built in area above cab, carpeted it as well as sides round cab and the ceiling.
5) the units are the kit from squarehaus and they came flat packed self build. My mentor Pat 'reiverlad' kept me right!! 😁😁😁

The framing is for the bed which needed to be raised anyway to allow trauma heater from reiverlads van to be put in ( thank you pat! Lol) and all electric cabling etc done by self, and now onto running gas pipes ( they will all be gas checked before used so no worries there.

Off for a wee lie Doon now, as can only manage couple hours max wae the knees and back. But getting there. See you all soon hopefully

IMG_20241002_110644121_HDR.jpgIMG_20241002_110640433_HDR.jpgIMG_20241002_110636712_HDR.jpgIMG_20241002_110627699_HDR.jpgIMG_20241002_110621481_HDR.jpgIMG_20241002_110618494_HDR.jpgIMG_20241002_110615112_HDR.jpg
 
Would Fergie like a 11kg Gasit bottle? I want to swap my 11kg Gasit for a 6kg refillable because the 11kg doesn't fit in my newold camper locker.

Today:
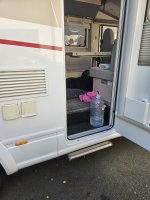
I collected my A/S Bourton from the Autosleeper factory in Willersey after some repairs and a damp certificate.
 
I took the Bourton for an MOT. The only place that could do it sooner than two weeks time was a garage I hadn't used before. I phoned this morning, they booked me in for 4pm this afternoon.
I sat in the waiting area and after a while Mr Tester came and said come and look at this. He had the left indicator running and the rear lights were like Blackpool illuminations on 5th November. All the lights on both sides were flashing. He said well unfortunately that's a fail. The rear lights on the Bourton are a fancy LED thing, all moulded into one blob with no apparent means of removing them. Even the brake lights including the roof light were flashing.
I asked is that something you can diagnose?
He said well it depends if its on the Mercedes chassis wiring or the converter wiring. These LED lights tend to run via a power resistor.
I remembered going under my A/S Nuevo and seeing power resistors screwed to the plywood floor, just behind the rear wheel where they would be 'water cooled'. i.e. corroded. I lay down, got underneath the Bourton and saw them, and remembered that when I first got this camper a year ago I had covered the ends of the resistors where they go rusty, with Waxoyl. So they weren't rusty, they were all warm meaning current was going through them all.
Mr Tester said there will probably be a plug and socket connector for each set of side lights.
I looked across the chassis following the resistor wires and sure enough they ran to two multi pin plugs and sockets. I tried disconnecting one, failed, tried the other, and with a lot of effort managed to turn one half of the connector against the other, then pull them apart.
Mr Tester said ah, something's happened. What did you do? I pulled one connector off.
Having found out how they disconnect I put that connector back together. I then put more effort into the first one. As I managed to start it moving Mr Tester said Hold it, don't do anything. It's working. I left it alone, crawled out, saw the lights working properly and said That will be a pass, then, jokingly. Quite right, he said, I'll go and enter the results. He went back in the office to register the pass. Meanwhile I wriggled the plug back and forwards, and managed to separate the two halves. One pin was obviously corroded so I connected /disconnected the plug and socket several times to wipe the corrosion off. I went in the office and explained, I had found the corroded pin and will clean it with electrical cleaner when I get home. He said would you like some cleaner? Yes please, and I got back under, undid the plug and socket, cleaned up all the pins with the spray and refitted the two halves, then did the other plug / socket.
I thought I had tried all the garages round my area, and found faults with all of them. This was the first time I tried this garage, and I was so thrilled with the co-operation there, not just immediately failing the MOT but suggesting where to look and helping me to find and fix the fault. I won't be going anywhere else in future!
Instead of just producing the fail certificate and book it in for remedial work he helped me to find and fix the fault, saving me lots of drinking vouchers.
 
Back
Top